Inviting guests to a meeting
If you'd like to invite somone to a meeting who does not have a Suffield Academy account you can follow these steps. Additionally, be sure to review the instructions for admitting guests to a meeting so you will be ready when your meeting starts.
In Microsoft Teams, create a new meeting (typically from the Calendar view). Set title, date, and time as you normally would.
Under the title entry is a place to add invitees to your meeting. Type the complete email address for the external guest you want to invite to the meeting. After a couple of seconds, a box should pop up below the email address prompting you to Invite the email address. You must click this box or hit tab to accept the email address.
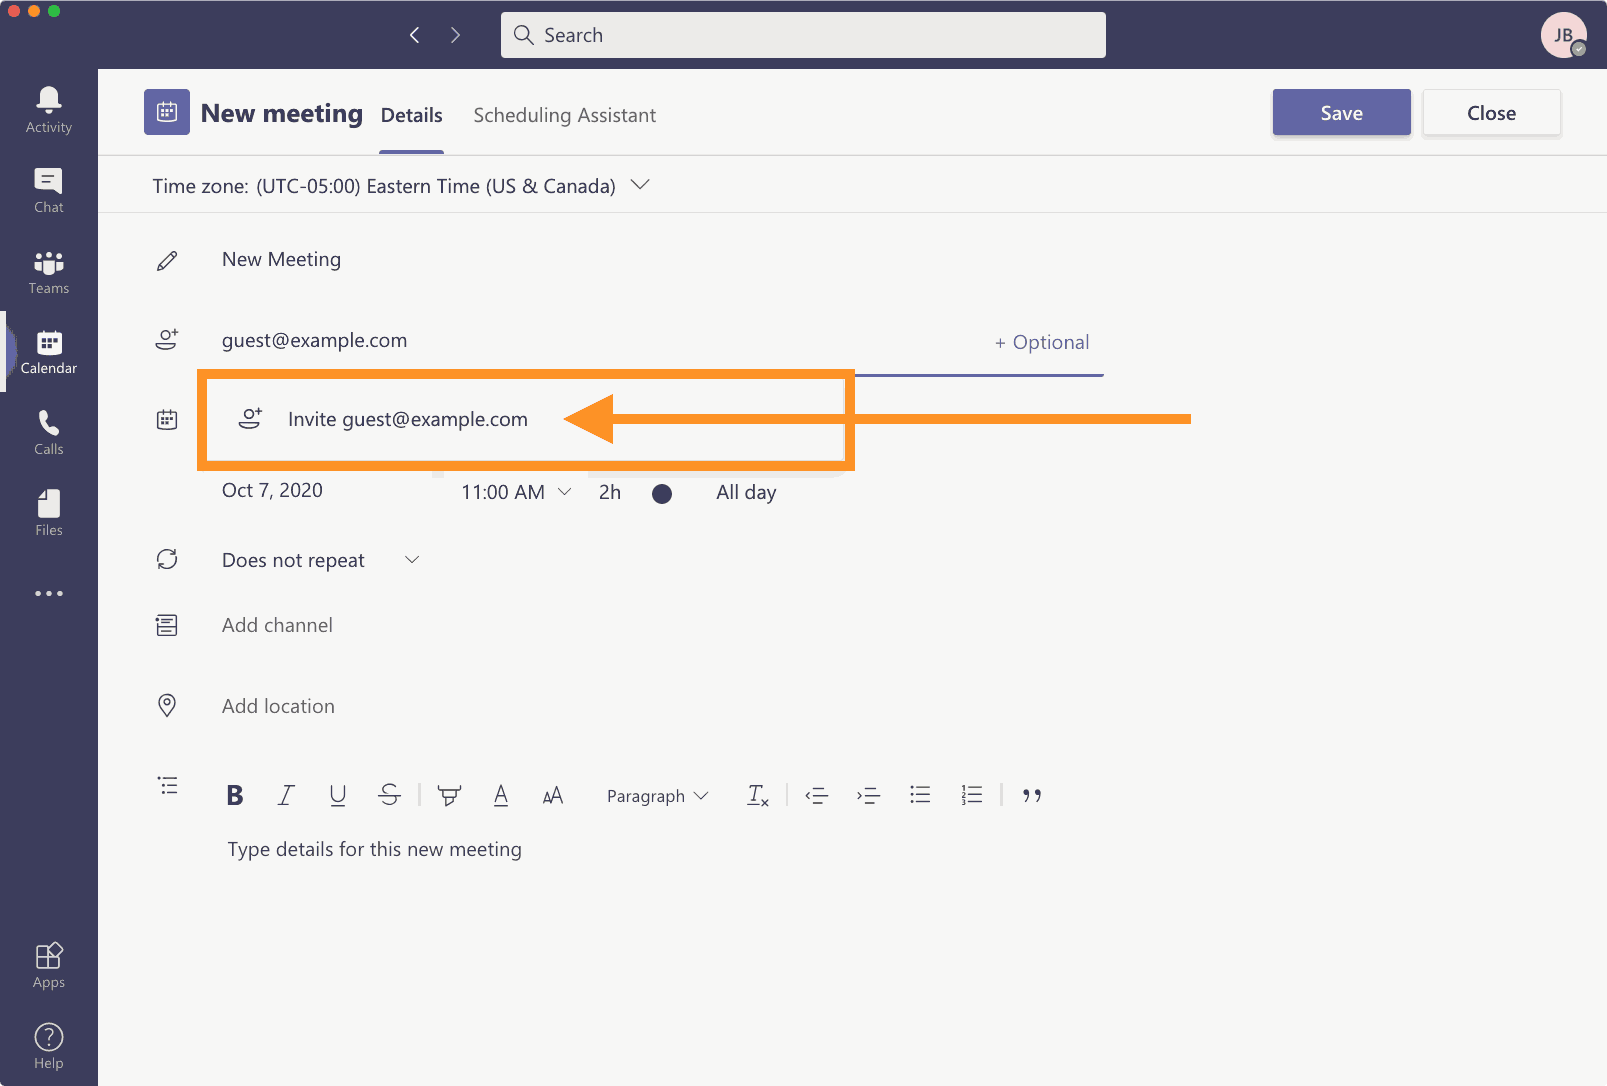
The display of the email address should change to a box with an X. This means the address has been converted to a "participant" who will receive an invite.
You may enter additional email addresses by repeating these steps. When you're done, click the Send button to schedule the meeting and automatically email an invite to all addresses that you've entered.

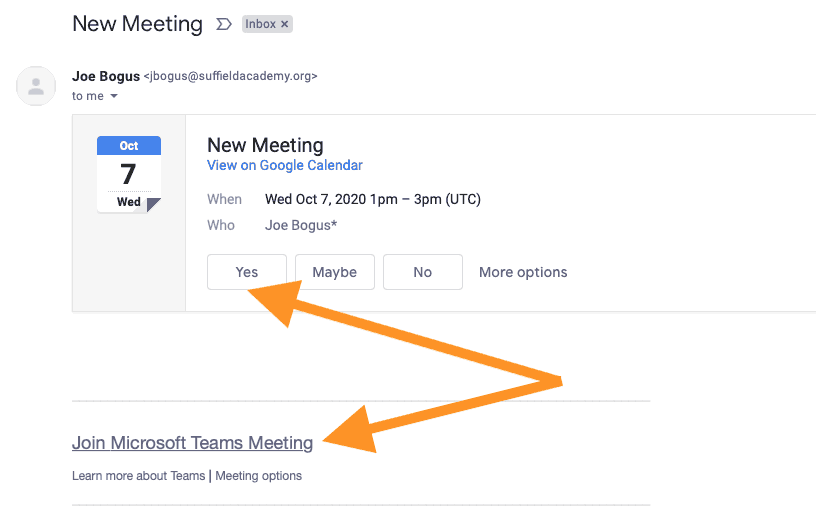
The receipient will receive an invite to join the meeting. Mail clients that support calendar invites will allow the user to accept the meeting invitation, and the address will show as Confirmed in Teams once they accept. All users will see a Join Microsoft Teams Meeting link which they will use when the meeting has started.
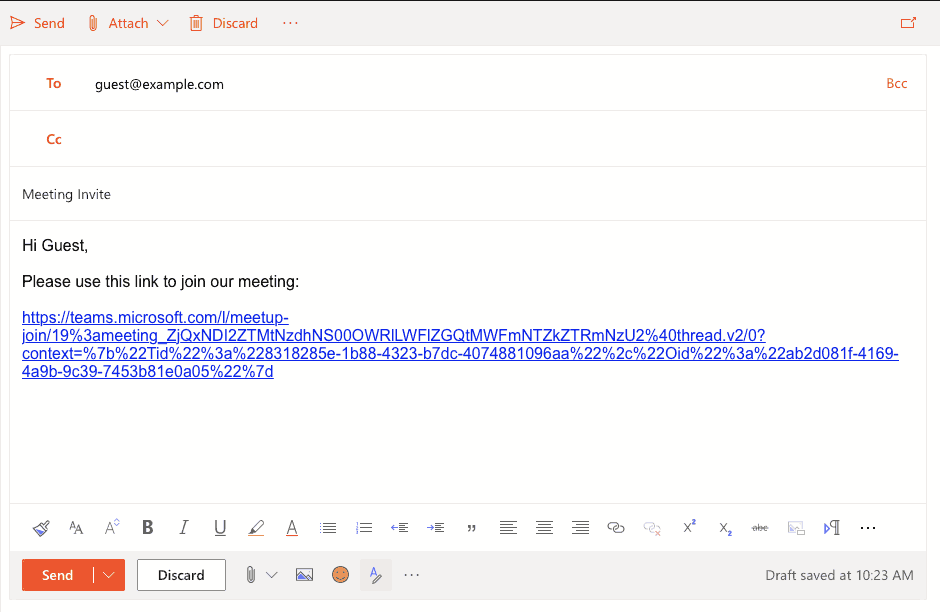
An example of what the invitation looks like is shown here. Note that they may appear differently for different users, but all should have the link to join the meeting.
The invite will automatically include links to web pages to learn more about how to download software and join the meeting. We also have a page explaining this process which you are welcome to send directly to meeting participants:
https://start.suffieldacademy.org/teamsguest/
Alternate method: sharing a link to an existing meeting
If you'd like to share a meeting with multiple people and do not wish to invite each one individually, you can get a direct link to the meeting that people can use to join. Use this method if you wish to send the link to muliple people (for example, on an email list), or post it through means other than email (such as a web page, social media, or other site).
Bear in mind that any user with the link can attempt to join the meeting, so don't post links publicly unless you want anyone to be able to join.
Additionally, be sure to review the instructions for admitting guests to a meeting so you will be ready when your meeting starts.
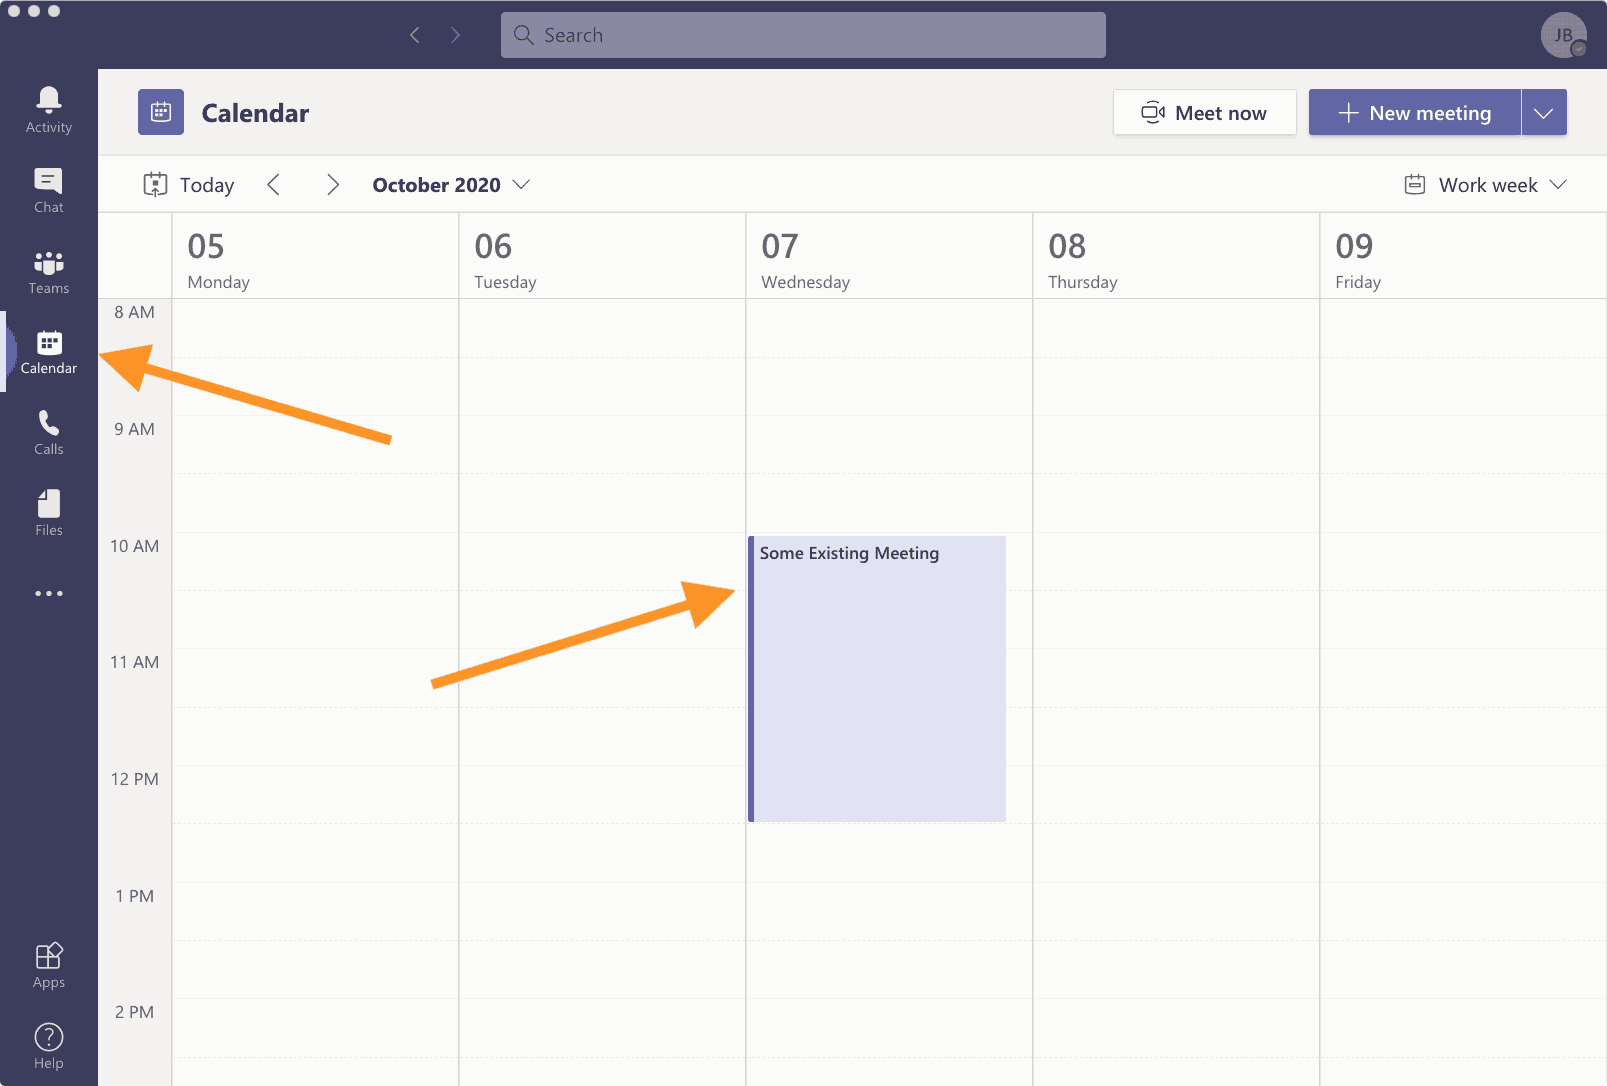
In Microsoft Teams, switch to the Calendar view.
Find and double-click on the meeting that you want to invite guests to. The meeting must already exist and be scheduled or else the next step will fail.
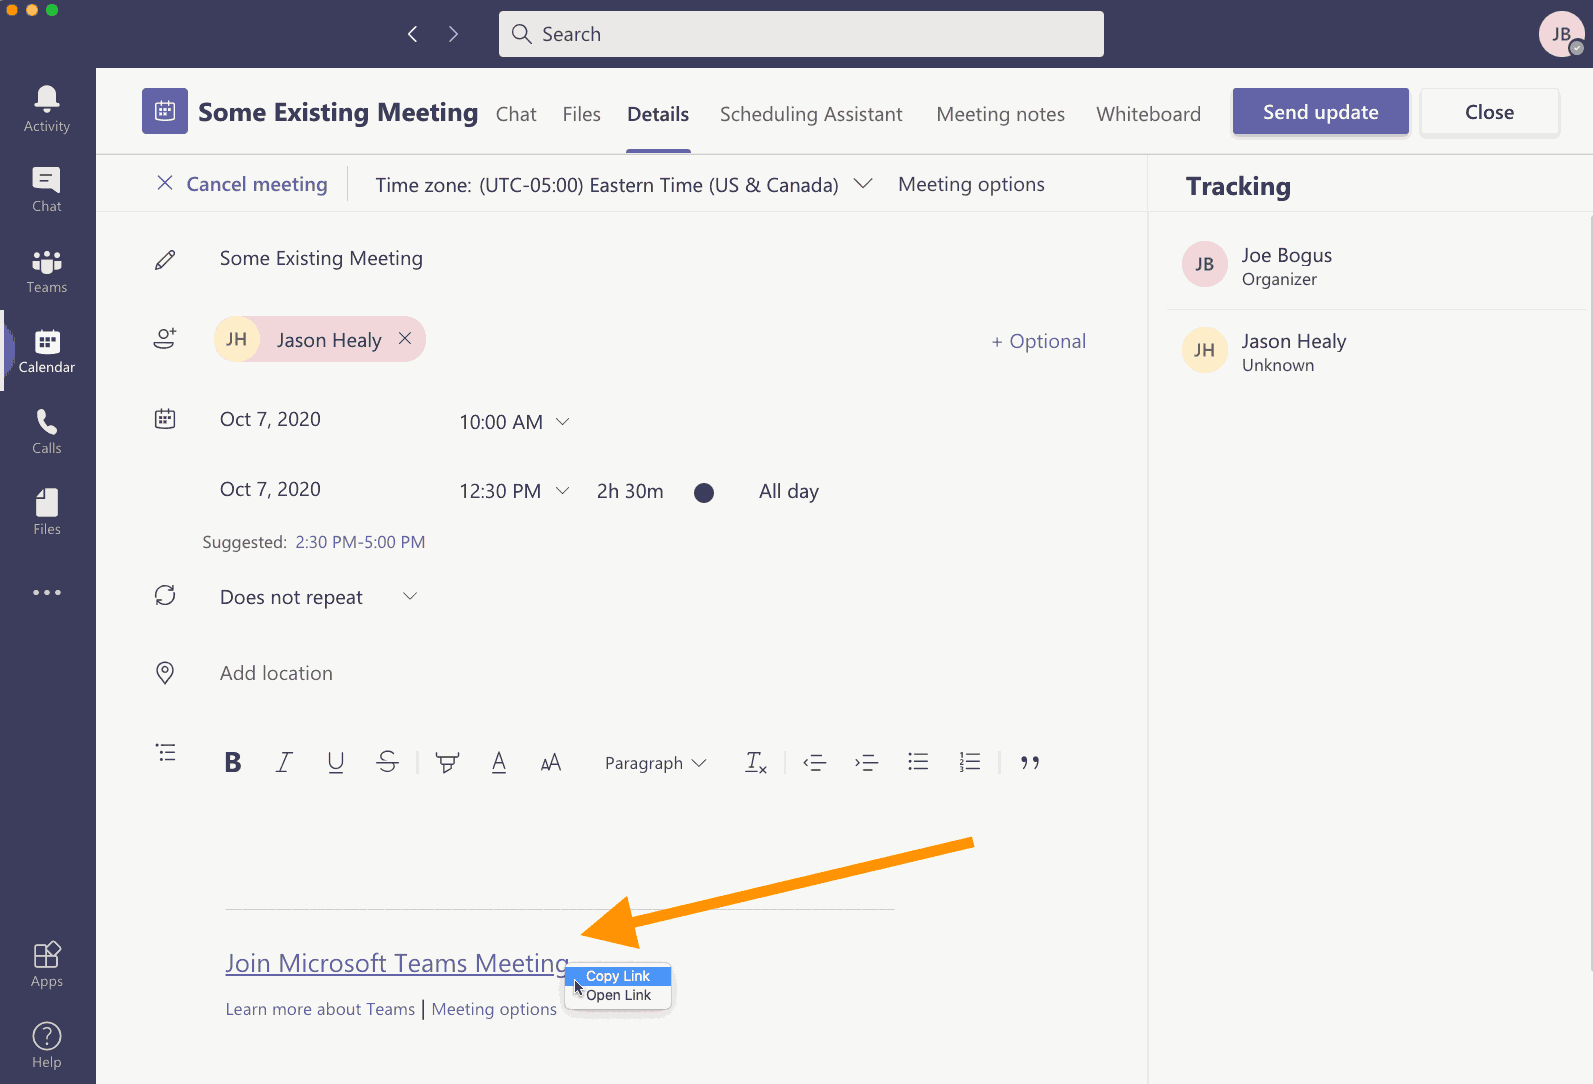
On the meeting details page, the bottom section will have a link titled Join Microsoft Teams Meeting. Hold the control key down and click on this text (or right-click on the text) and choose Copy Link.
If you don't see any text in this box, it's likely because the meeting has not been scheduled. These steps only work for existing meetings that have already been scheduled, as that's when the join link is generated. You can correct this issue by saving the meeting details and re-opening it. Note that you must have at least one attendee listed for the link to be generated, so invite at least one person before saving the meeting.
With the link copied, you can now paste it into an email, web page, or other form of communication. Remember that anyone with this link can join the meeting, so limit sharing only to people you want to have access to the meeting.
You may also wish to include a link to our documentation explaining how guests can download Teams and join the meeting:
https://start.suffieldacademy.org/teamsguest/
Admitting guests to a meeting
For security purposes, when a guest joins a meeting they are placed in the Lobby where they wait until a meeting organizer admits them to the meeting.
If you start a meeting that you've invited guests to, follow these instructions to ensure you've admitted them to the meeting when they join.
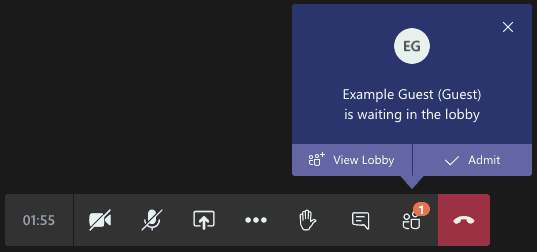
When a guest joins your meeting, you will see a pop-up notification telling you that they are in the lobby. You can click the Admit button to immediately grant them access to the meeting. Or, you can click View Lobby to see more information about the user.
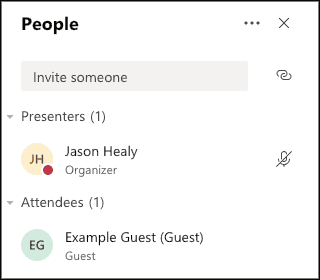
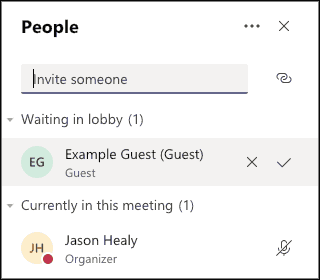
You may also view the lobby at any time by pressing the Show participants icon on your toolbar (looks like two "people": ![]() ). The Lobby will be shown as its own section, and you can click the check mark next to the guest's information to admit them to the meeting.
). The Lobby will be shown as its own section, and you can click the check mark next to the guest's information to admit them to the meeting.
Once admitted, the guest's information will move to the Attendees section, where you can manage them just like any other attendee (muting them, giving them presentation rights, and so on).