Log In To Your Account
Begin Signing In
Open a web browser and navigate to this page:
https://login.microsoftonline.com/
Enter your complete email address (your username followed by @suffieldacademy.org) and click Next
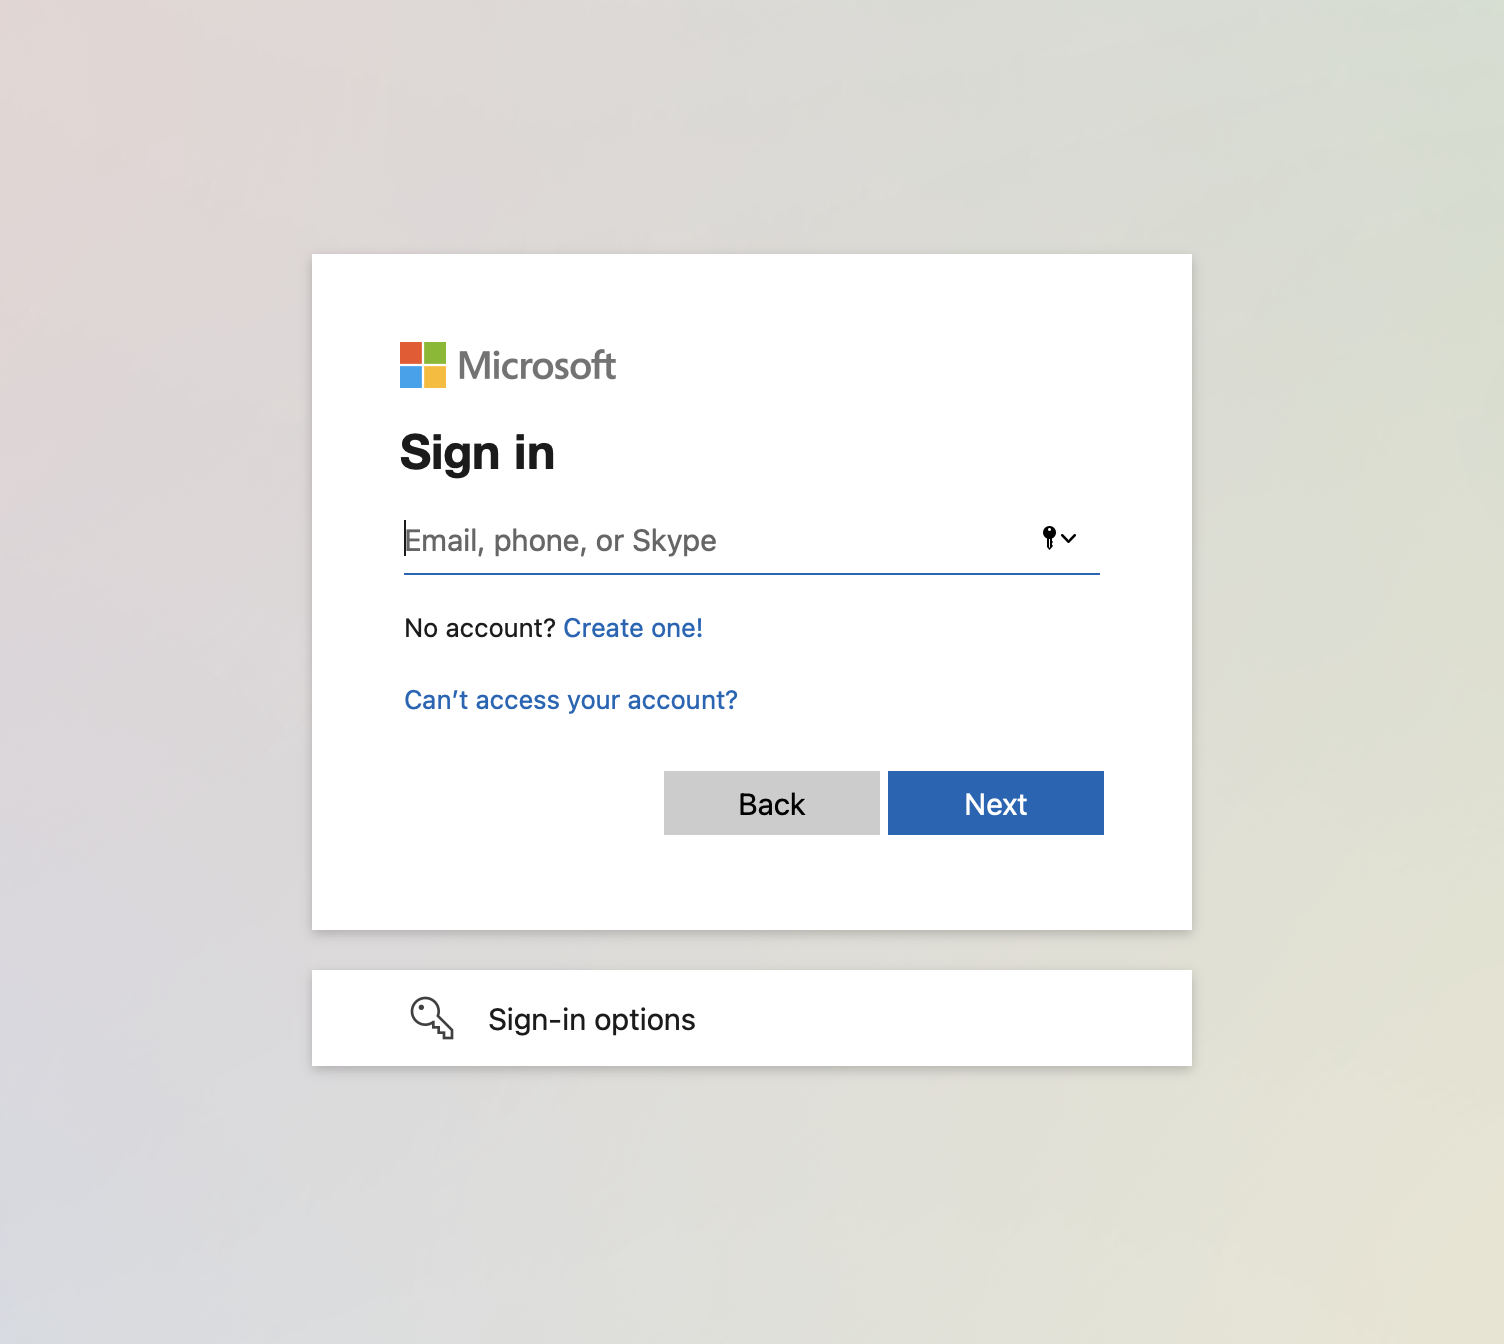
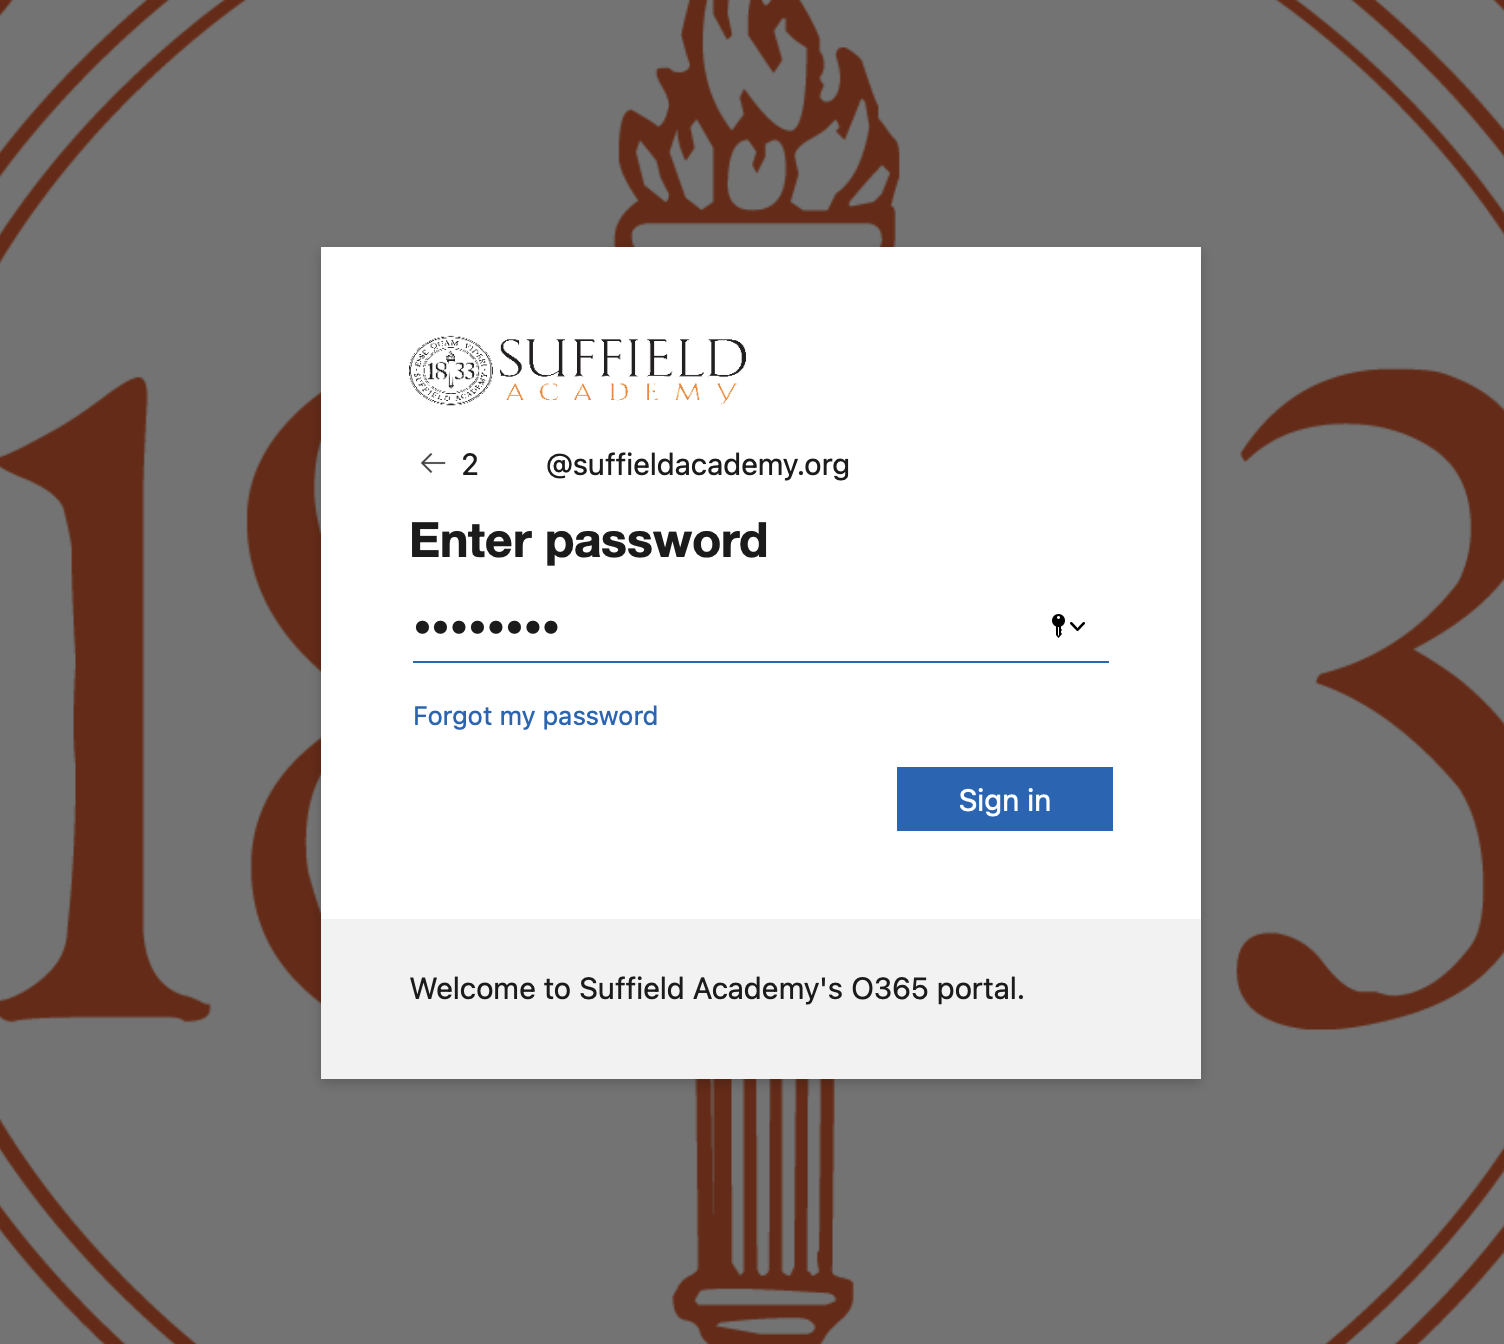
On the next screen, you should see an image of the school's seal (this helps verify that you aren't typing your password into a fake site). If the background looks correct, enter your initial password and click Sign in.
You will change your password to something you can remember in a later step.
Set Up Multi-Factor Authentication (MFA)
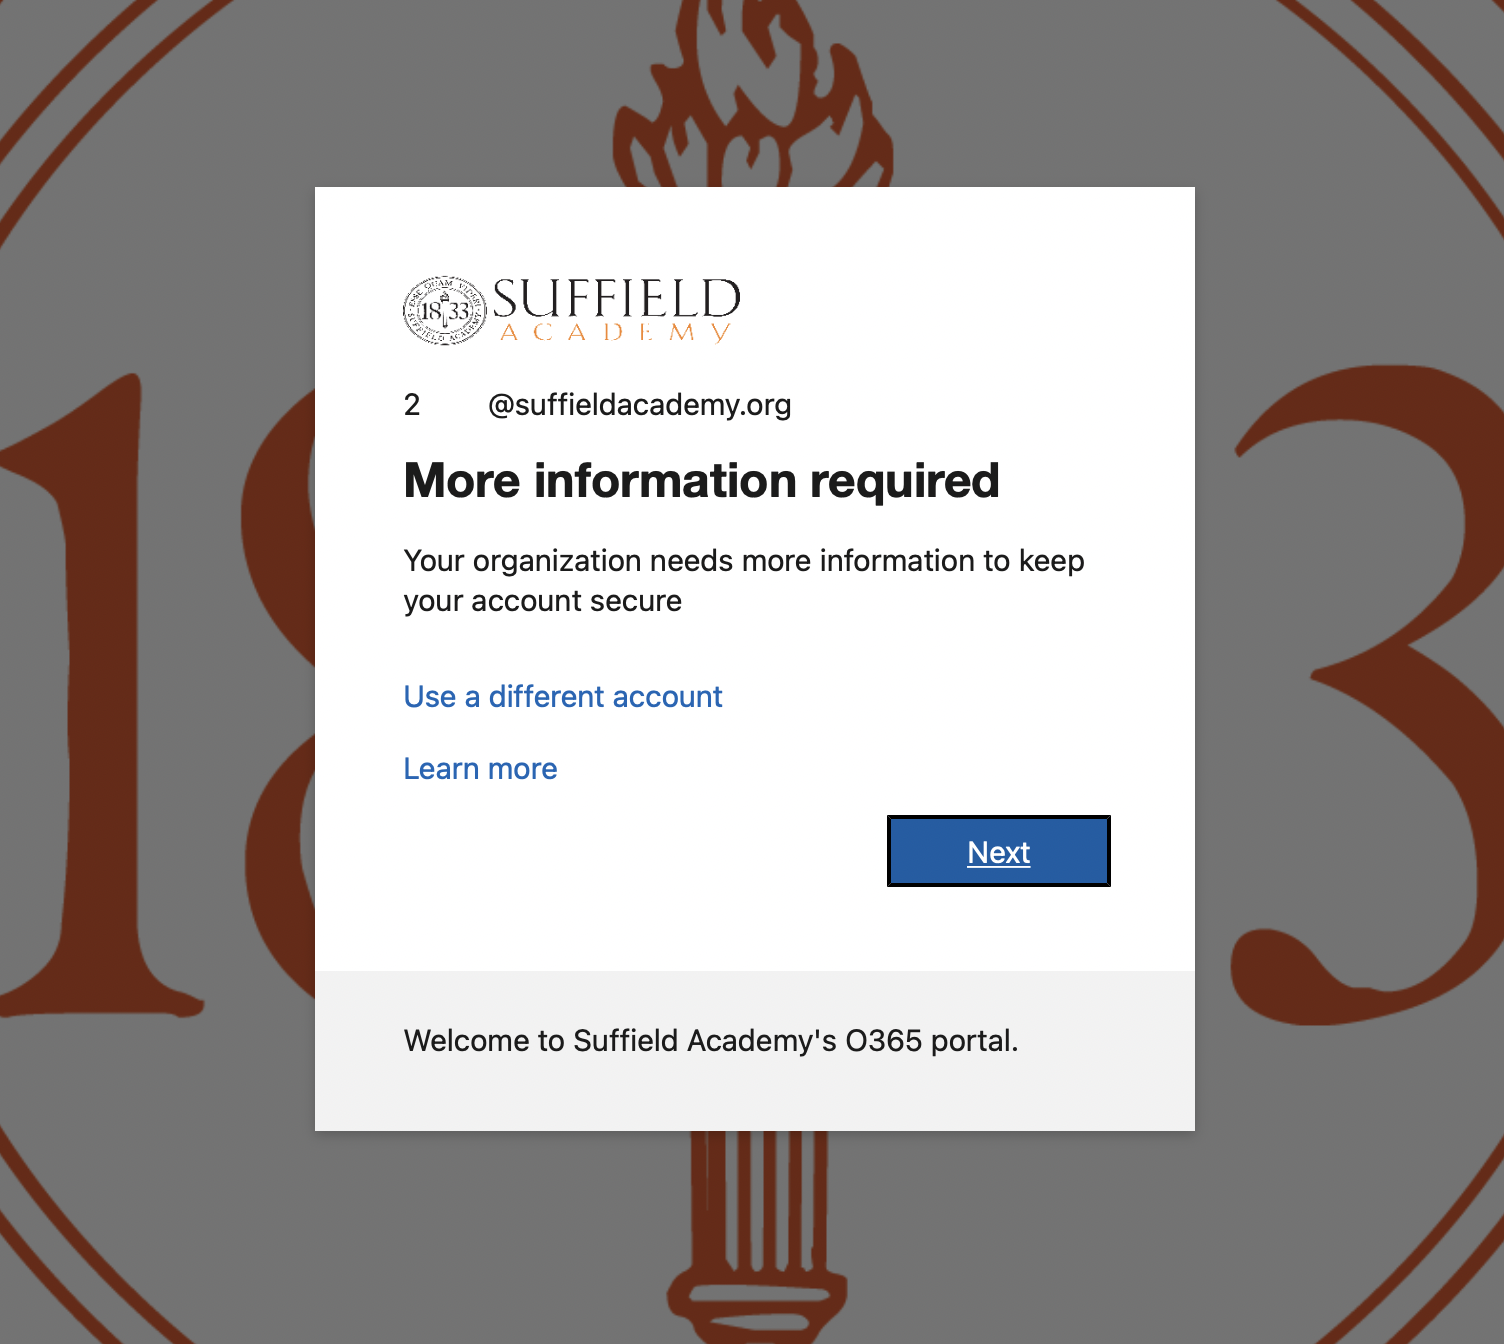
If this is your first time signing into your account, you will be notified that More information is required to sign in. This is because you must set up Multi-Factor Authentication (MFA) in order to secure your account.
Click the Next button to move to the next screen.
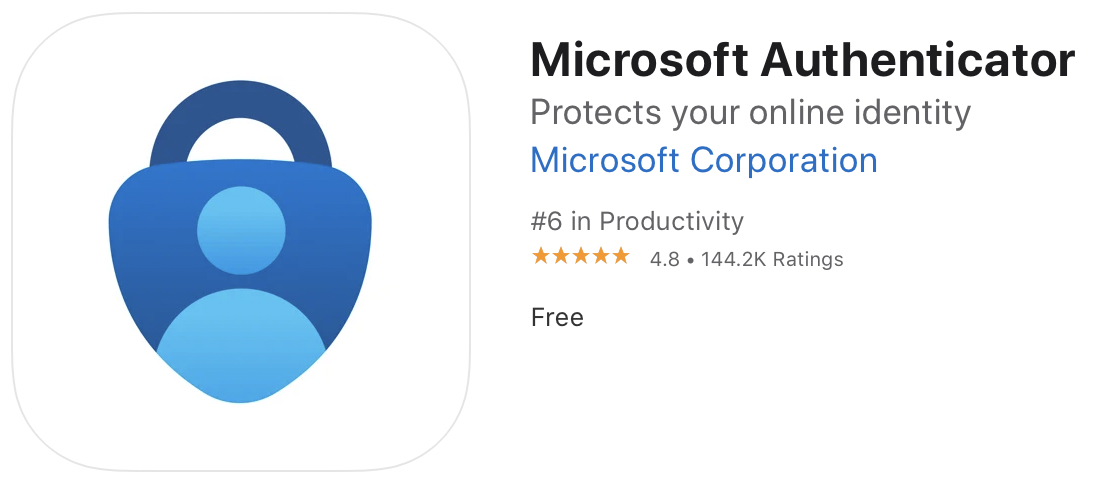
You will be prompted to install Microsoft Authenticator on your phone. A version is available in the Apple and Google app stores; please verify that the icon looks correct and that the software is published by Microsoft Corporation.

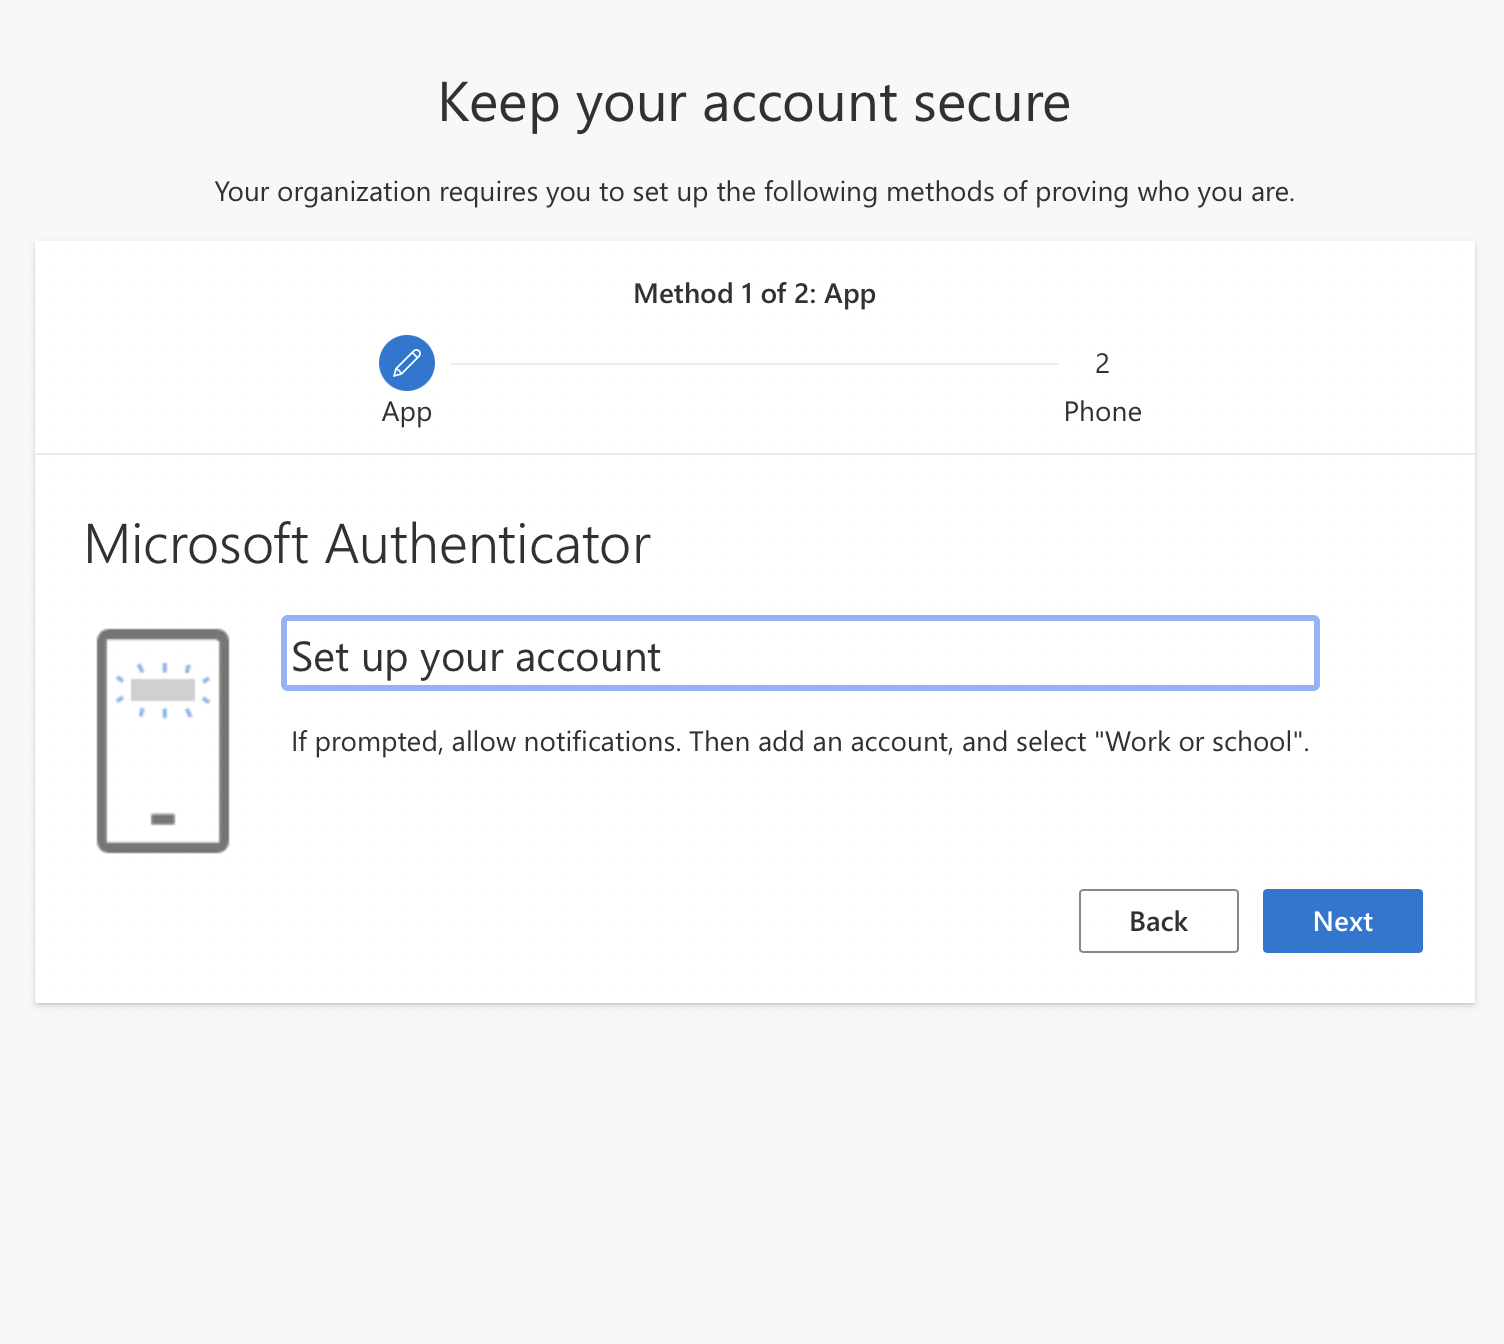
The web page will now prompt you to Set up your account.
On your phone, in Microsoft Authenticator, tap Add Account.
When prompted for the type of the account, choose Work or school account.
When asked how to add the account, choode Scan QR code.
Give the app permission to access the camera if prompted.
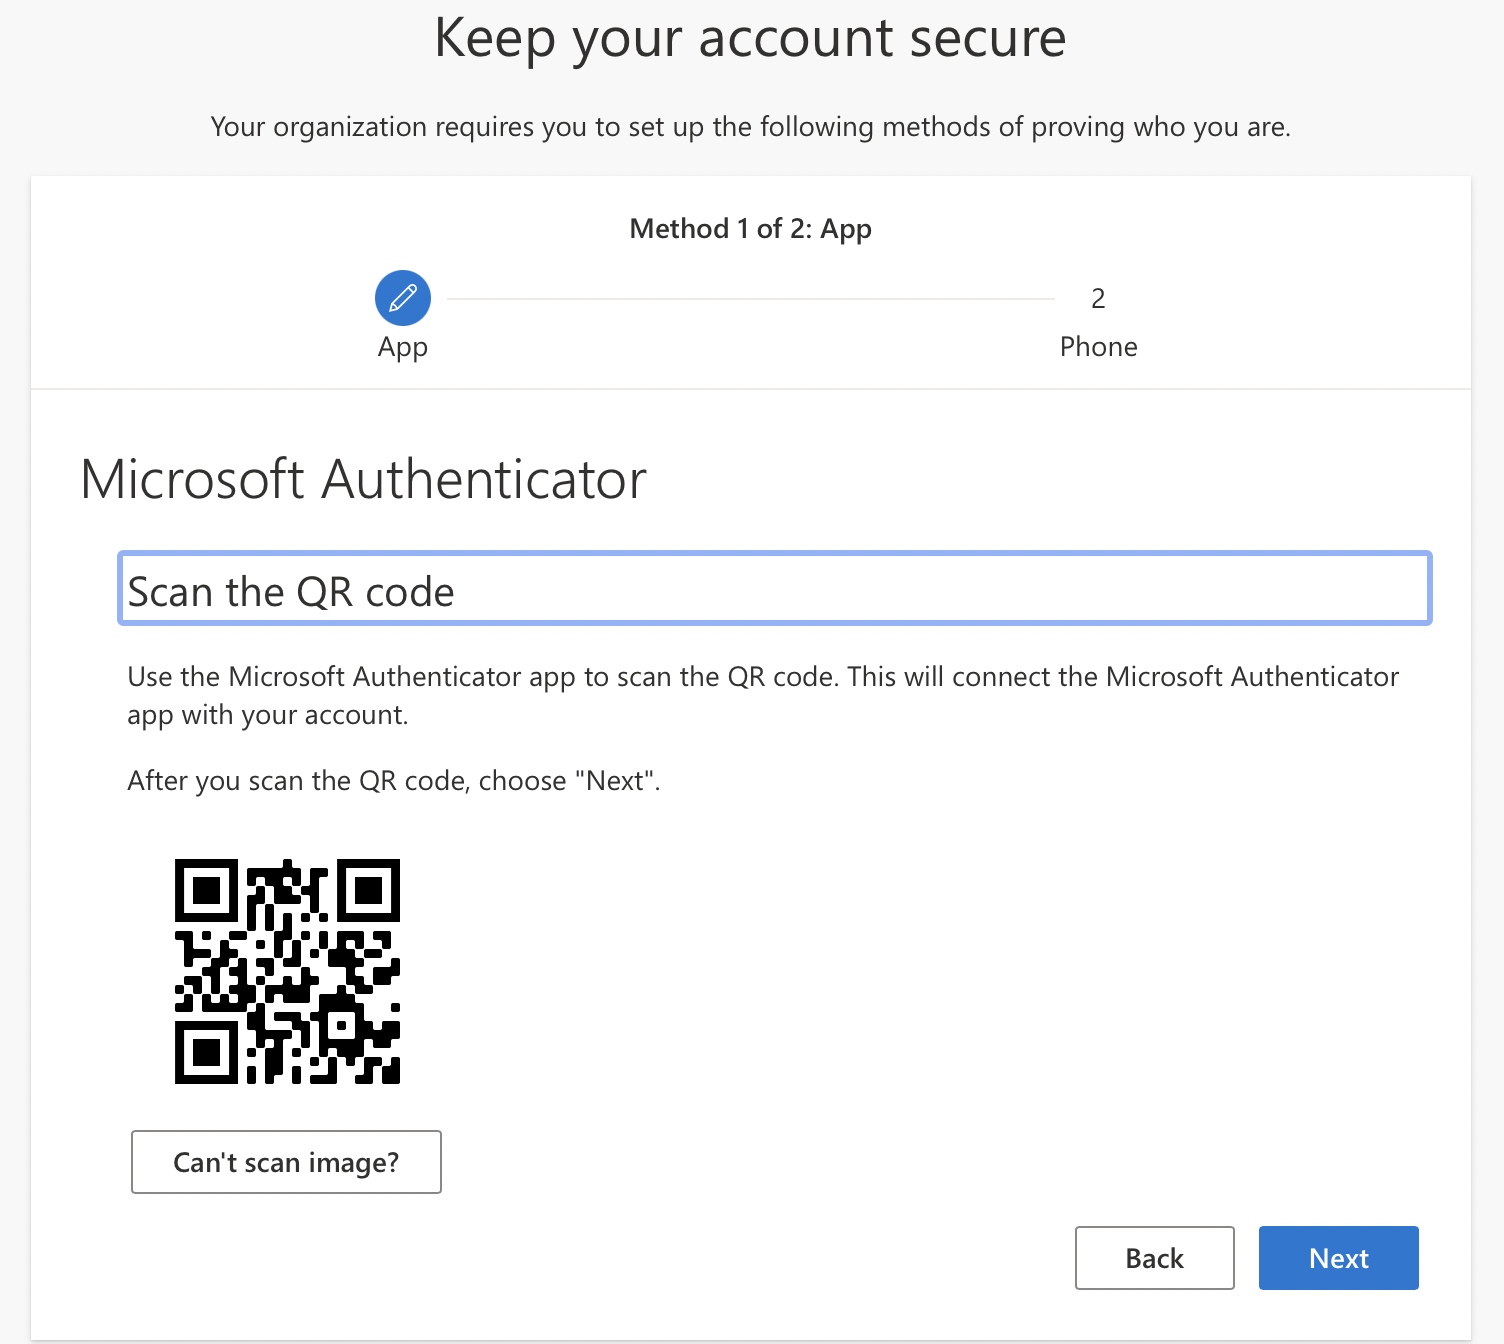
On your computer, click the Next button on the web page.

On your computer you should now see a screen with a QR code, similar to the one shown.
Point your phone camera at the QR code displayed on your computer. After a few seconds, the account should show up on your phone in Microsoft Authenticator.
On your computer, click the Next button on the web page.
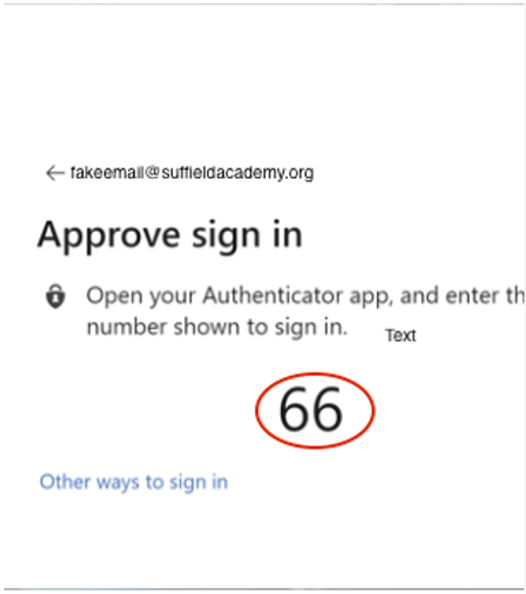
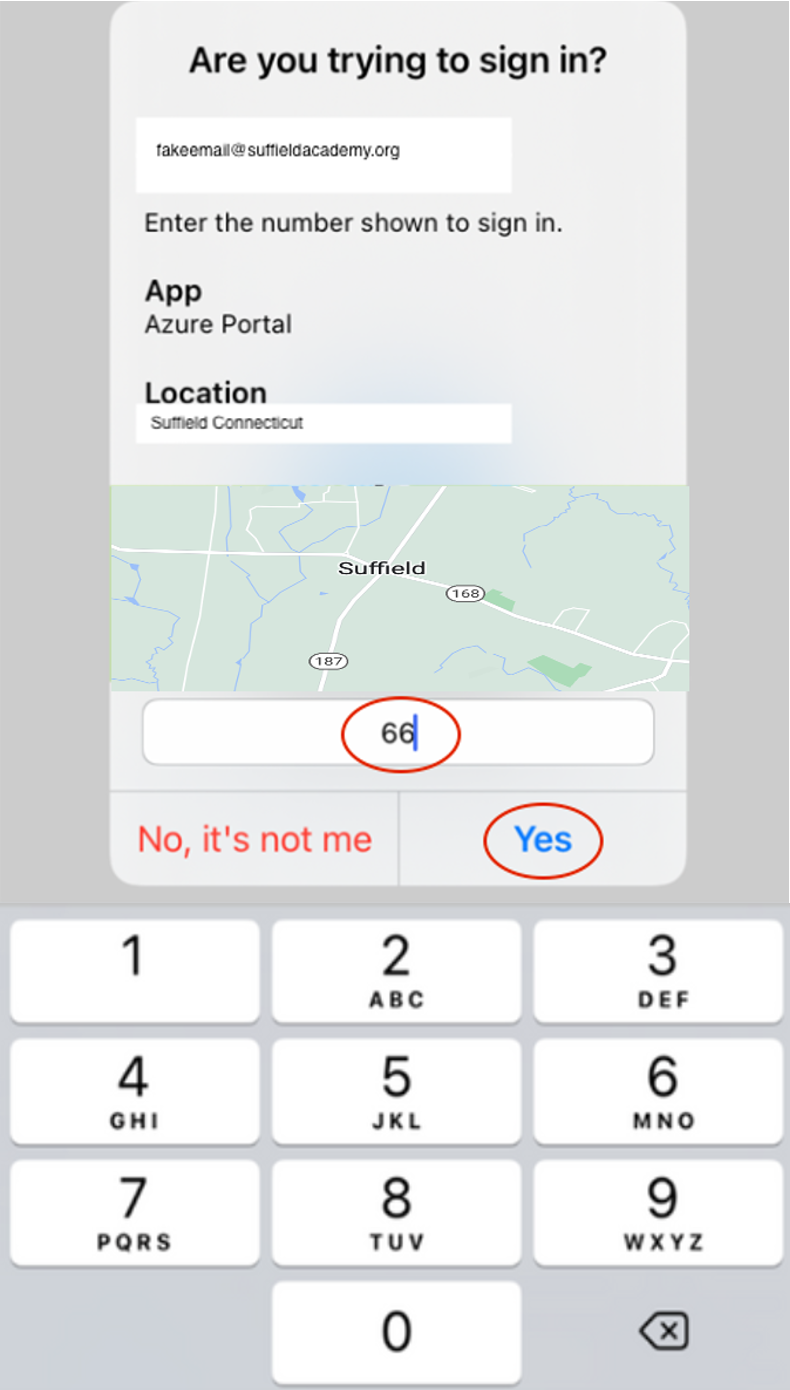
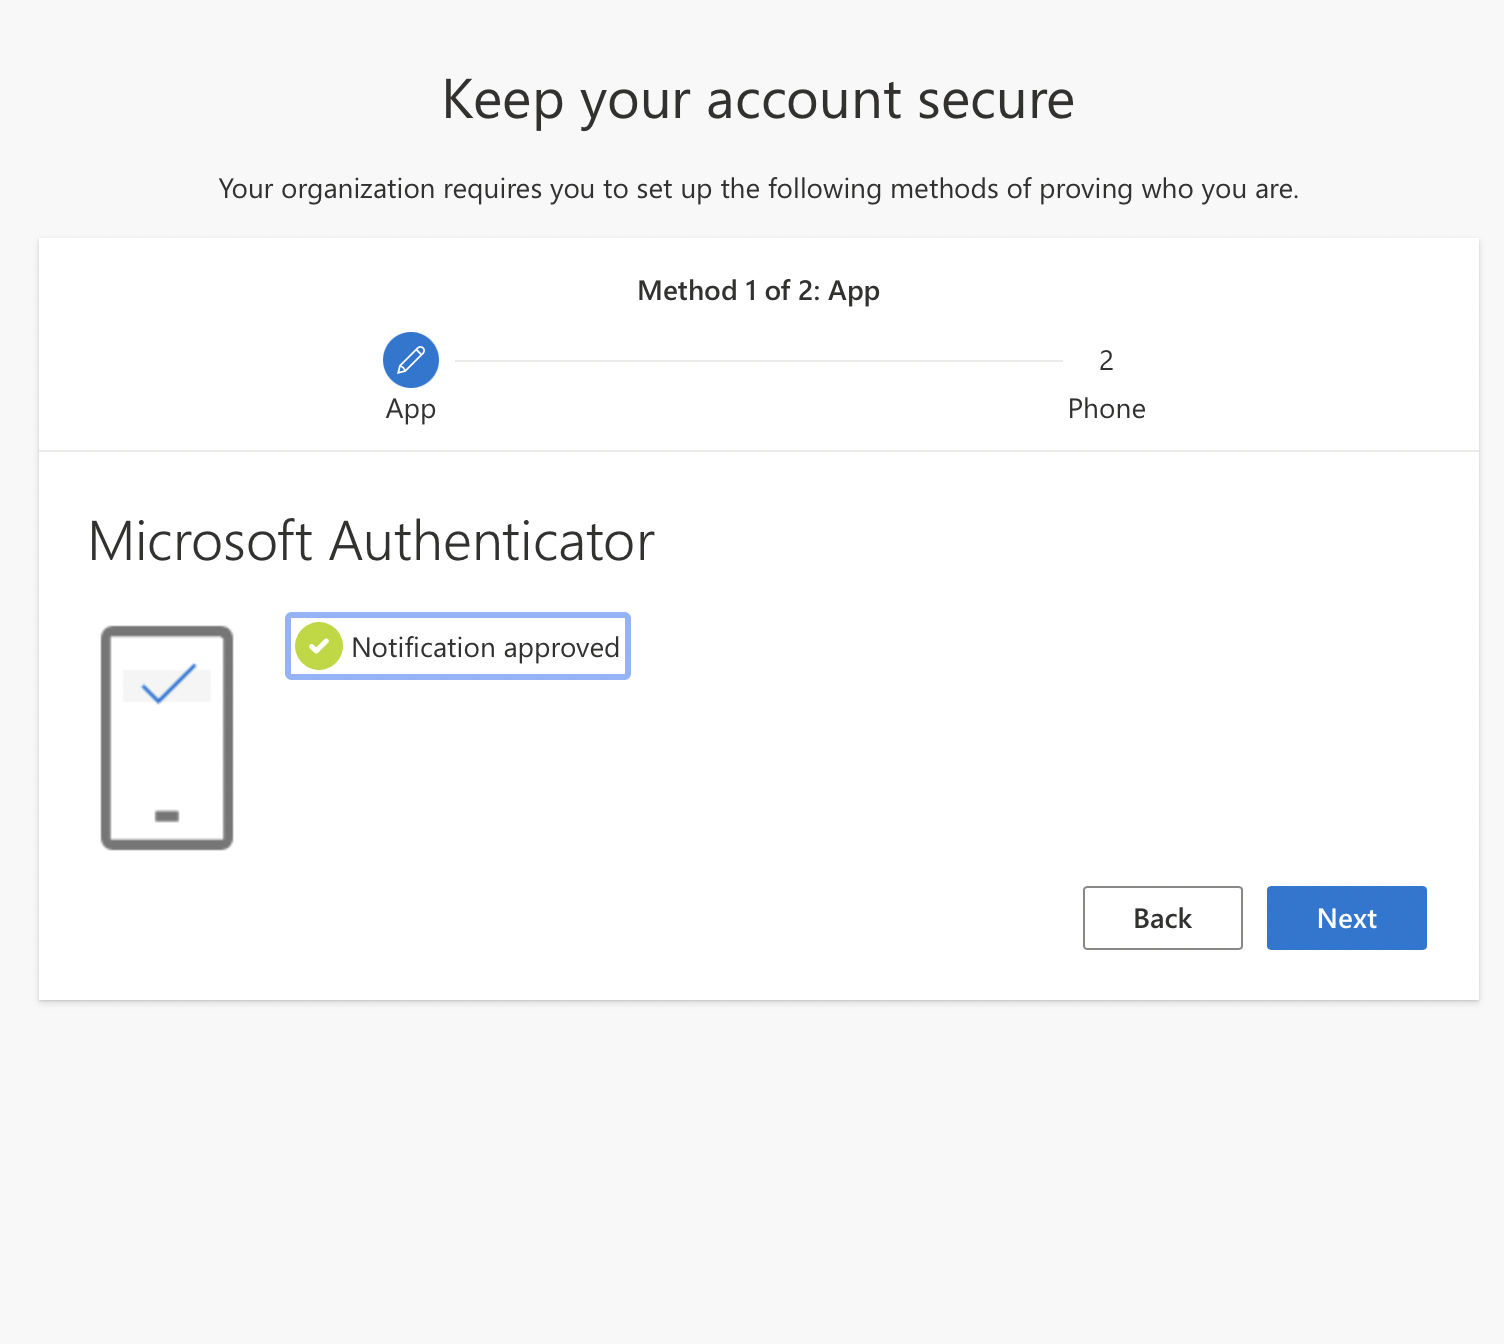
On your computer, the screen will change to tell you a confirmation notification is being sent to your phone. It will also display a two-digit number that you will need to enter on your phone.
On your phone, you should receive an approval notification for your account. You must enter the code shown on the web page (in the example to the left it is "66", but the number on your computer may differ) and tap Yes.
On your computer, the screen will change to tell you the notification was approved. Click the Done button.
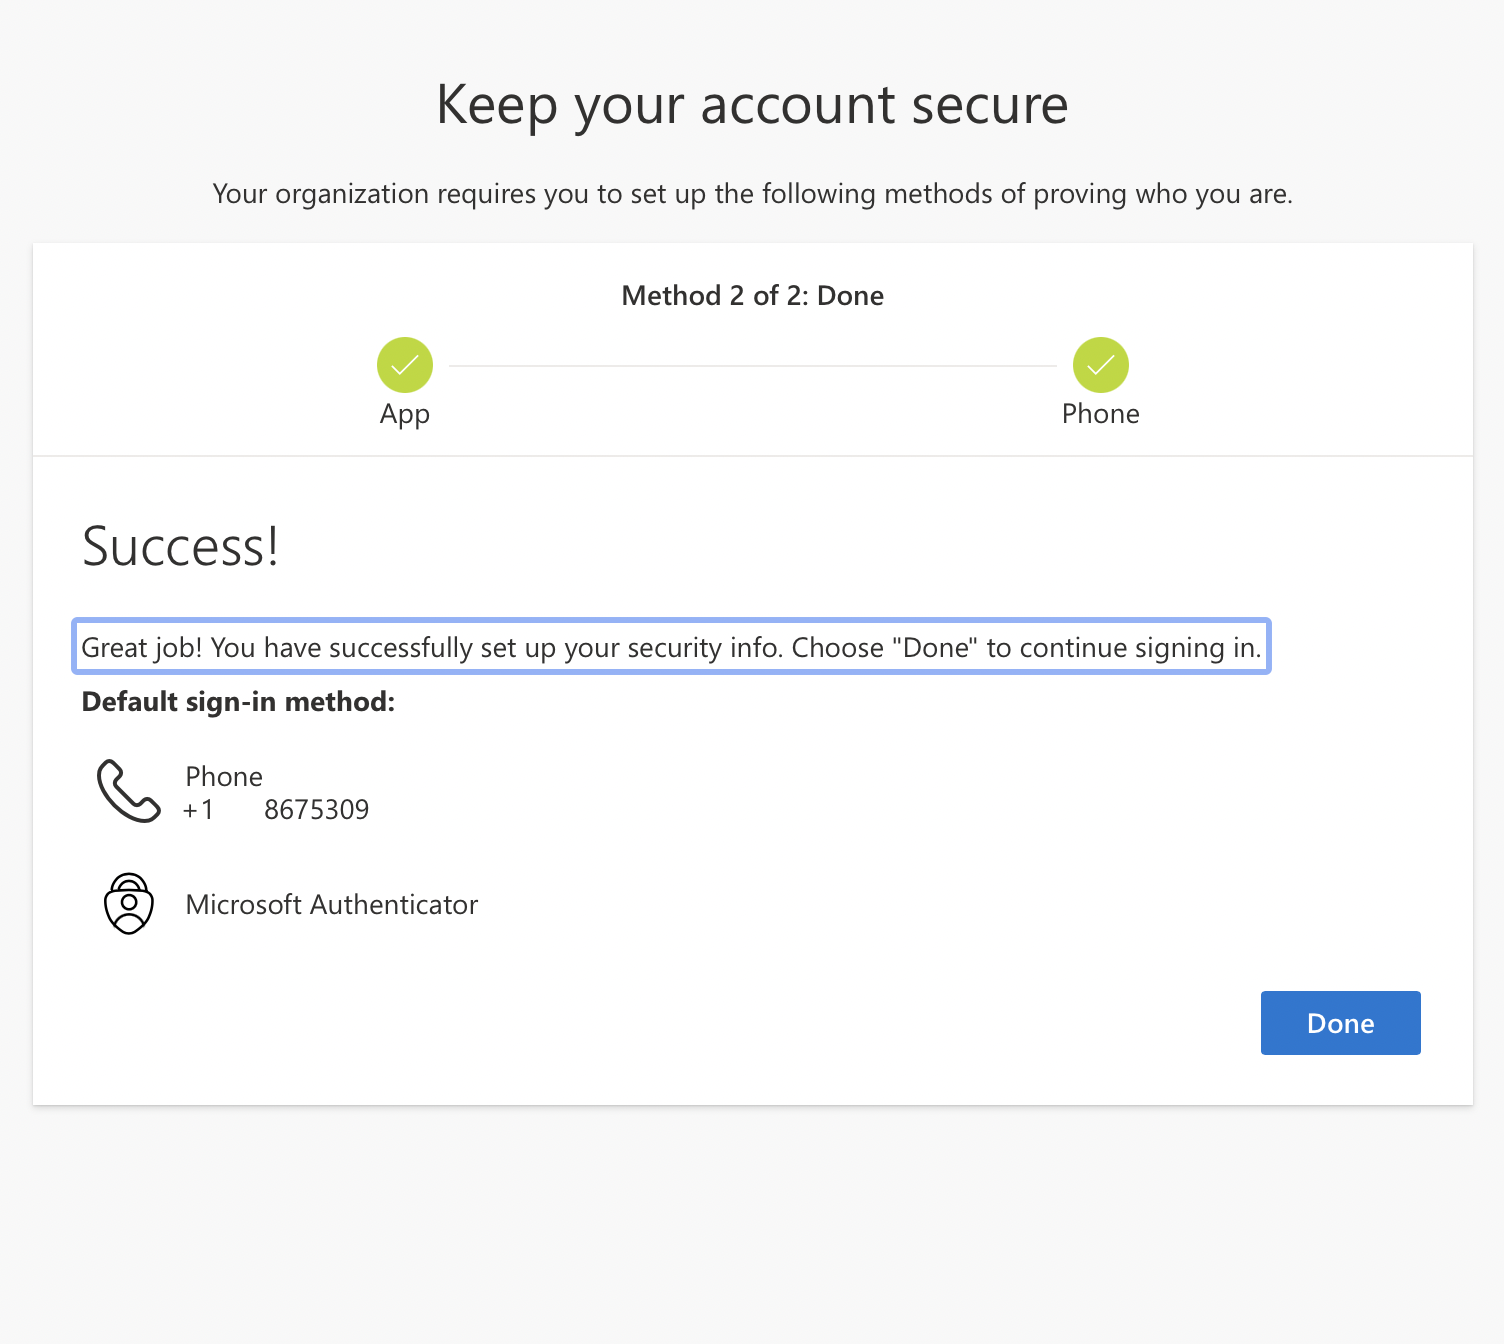
You should see a page confirming that you have entered all the one-time setup information.
Click the Done button to continue.
Change Your Password
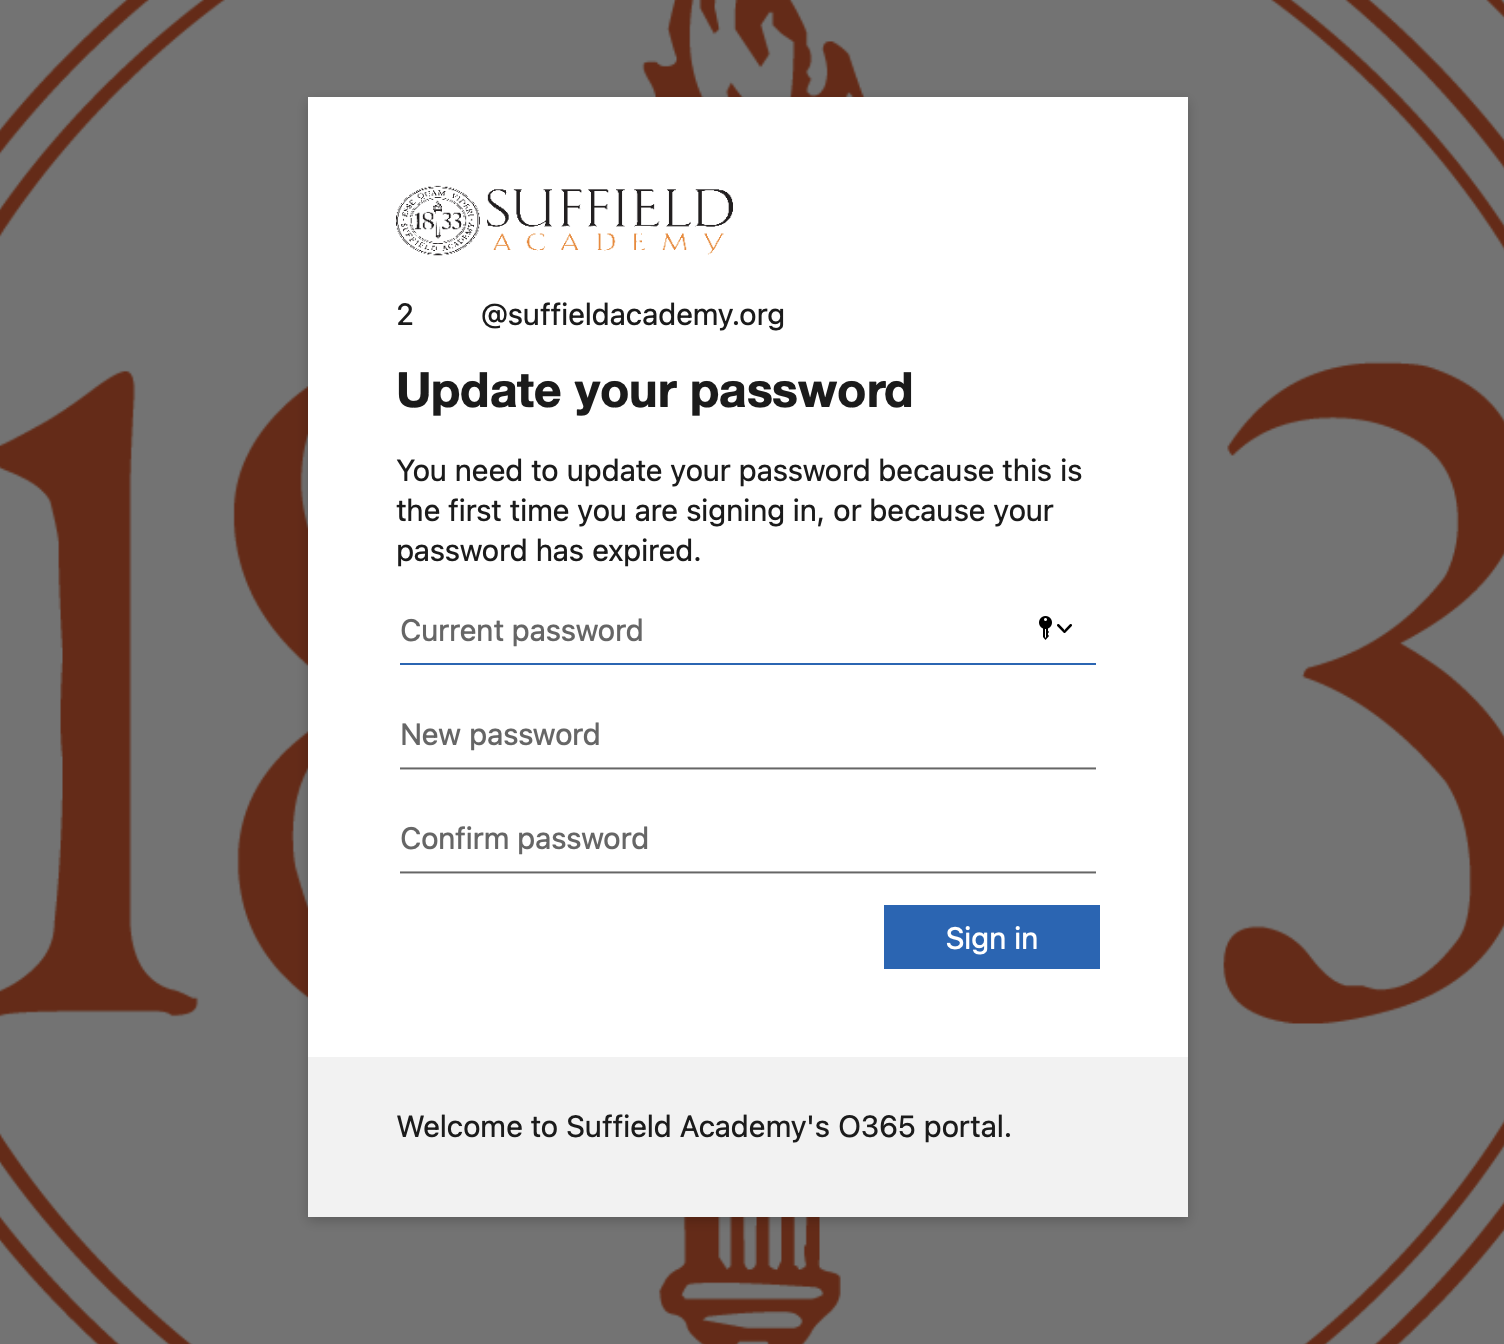
You will now be prompted to change your password to a value you can remember.
Enter your initial password that was provided to you for the Current Password. Then enter a new password of your choice in the New Password and Confirm Password boxes.
Click the Sign In button. If you receive a message that your password cannot be used, try a different one until it is accepted.
Check Your Email
Microsoft Outlook is the email system used at Suffield Academy. School announcements are sent via email, so you should check your account regularly. At the end of these instructions we also show you how to forward your email to another address if that makes it easier for you to check.
You should now be on the main Office 365 screen. Click the Outlook icon that looks like this:
![]()

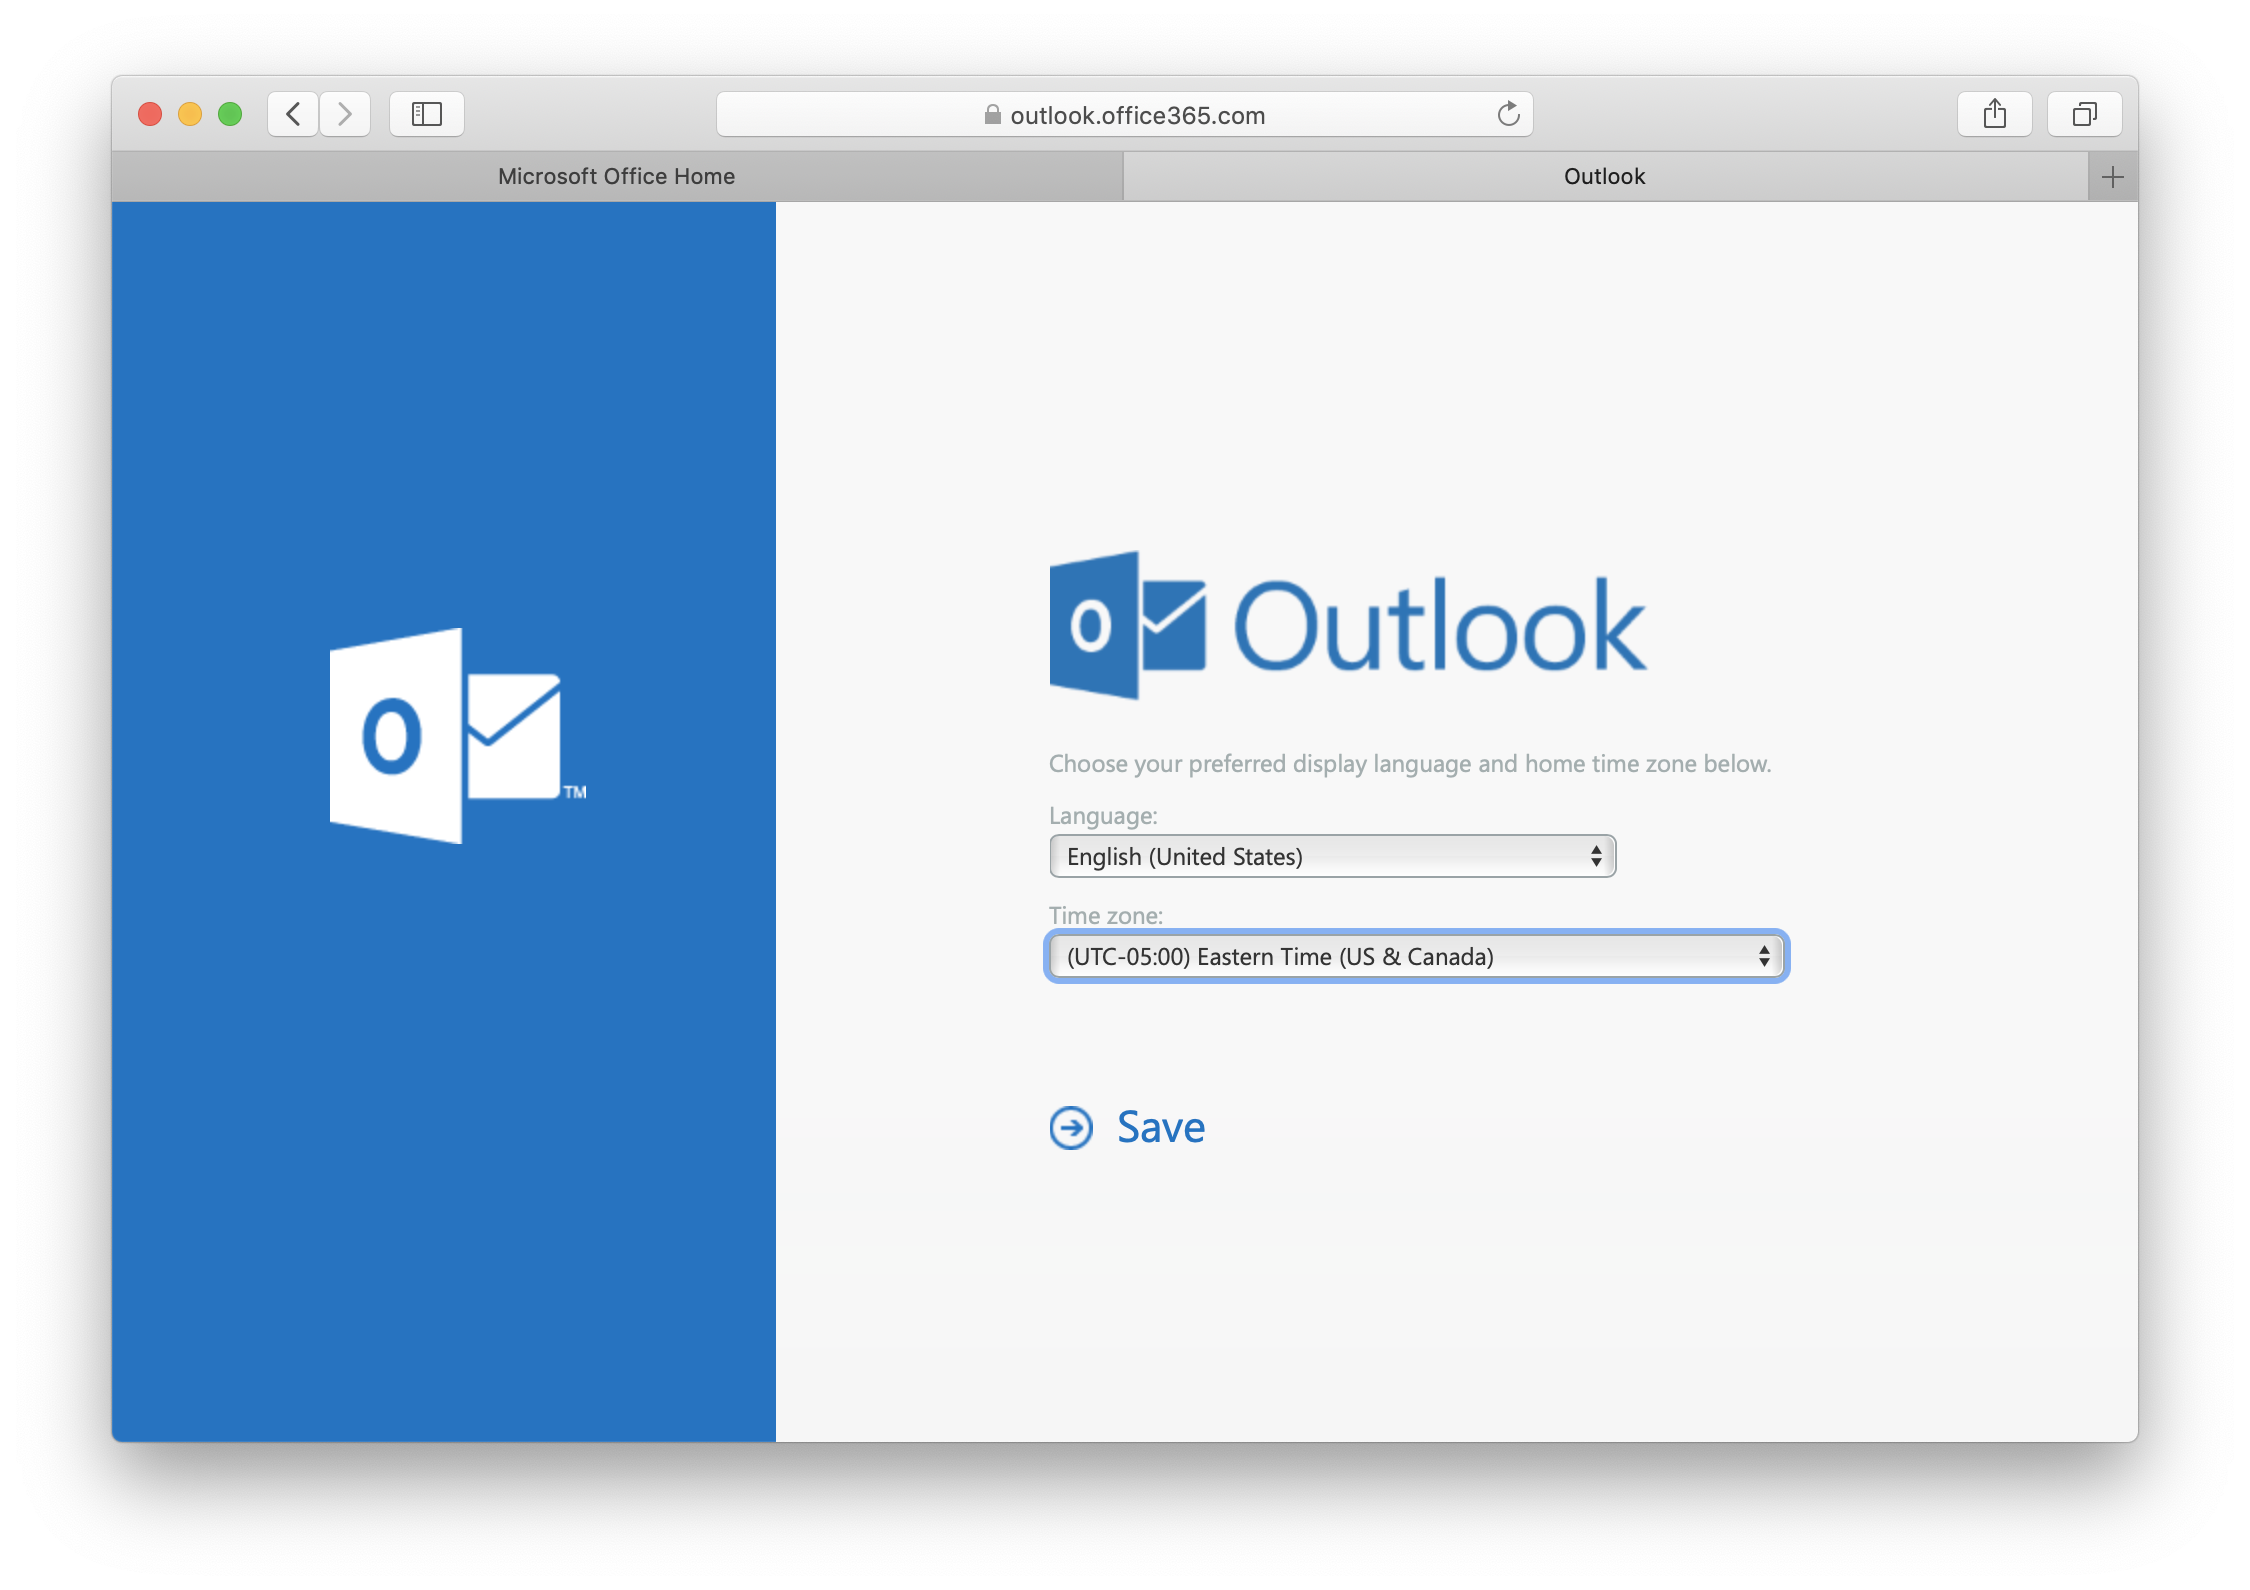
If prompted, select a primary language and timezone. Then click the Save button.
You should now arrive at your inbox in Outlook. You're ready to read and send email!
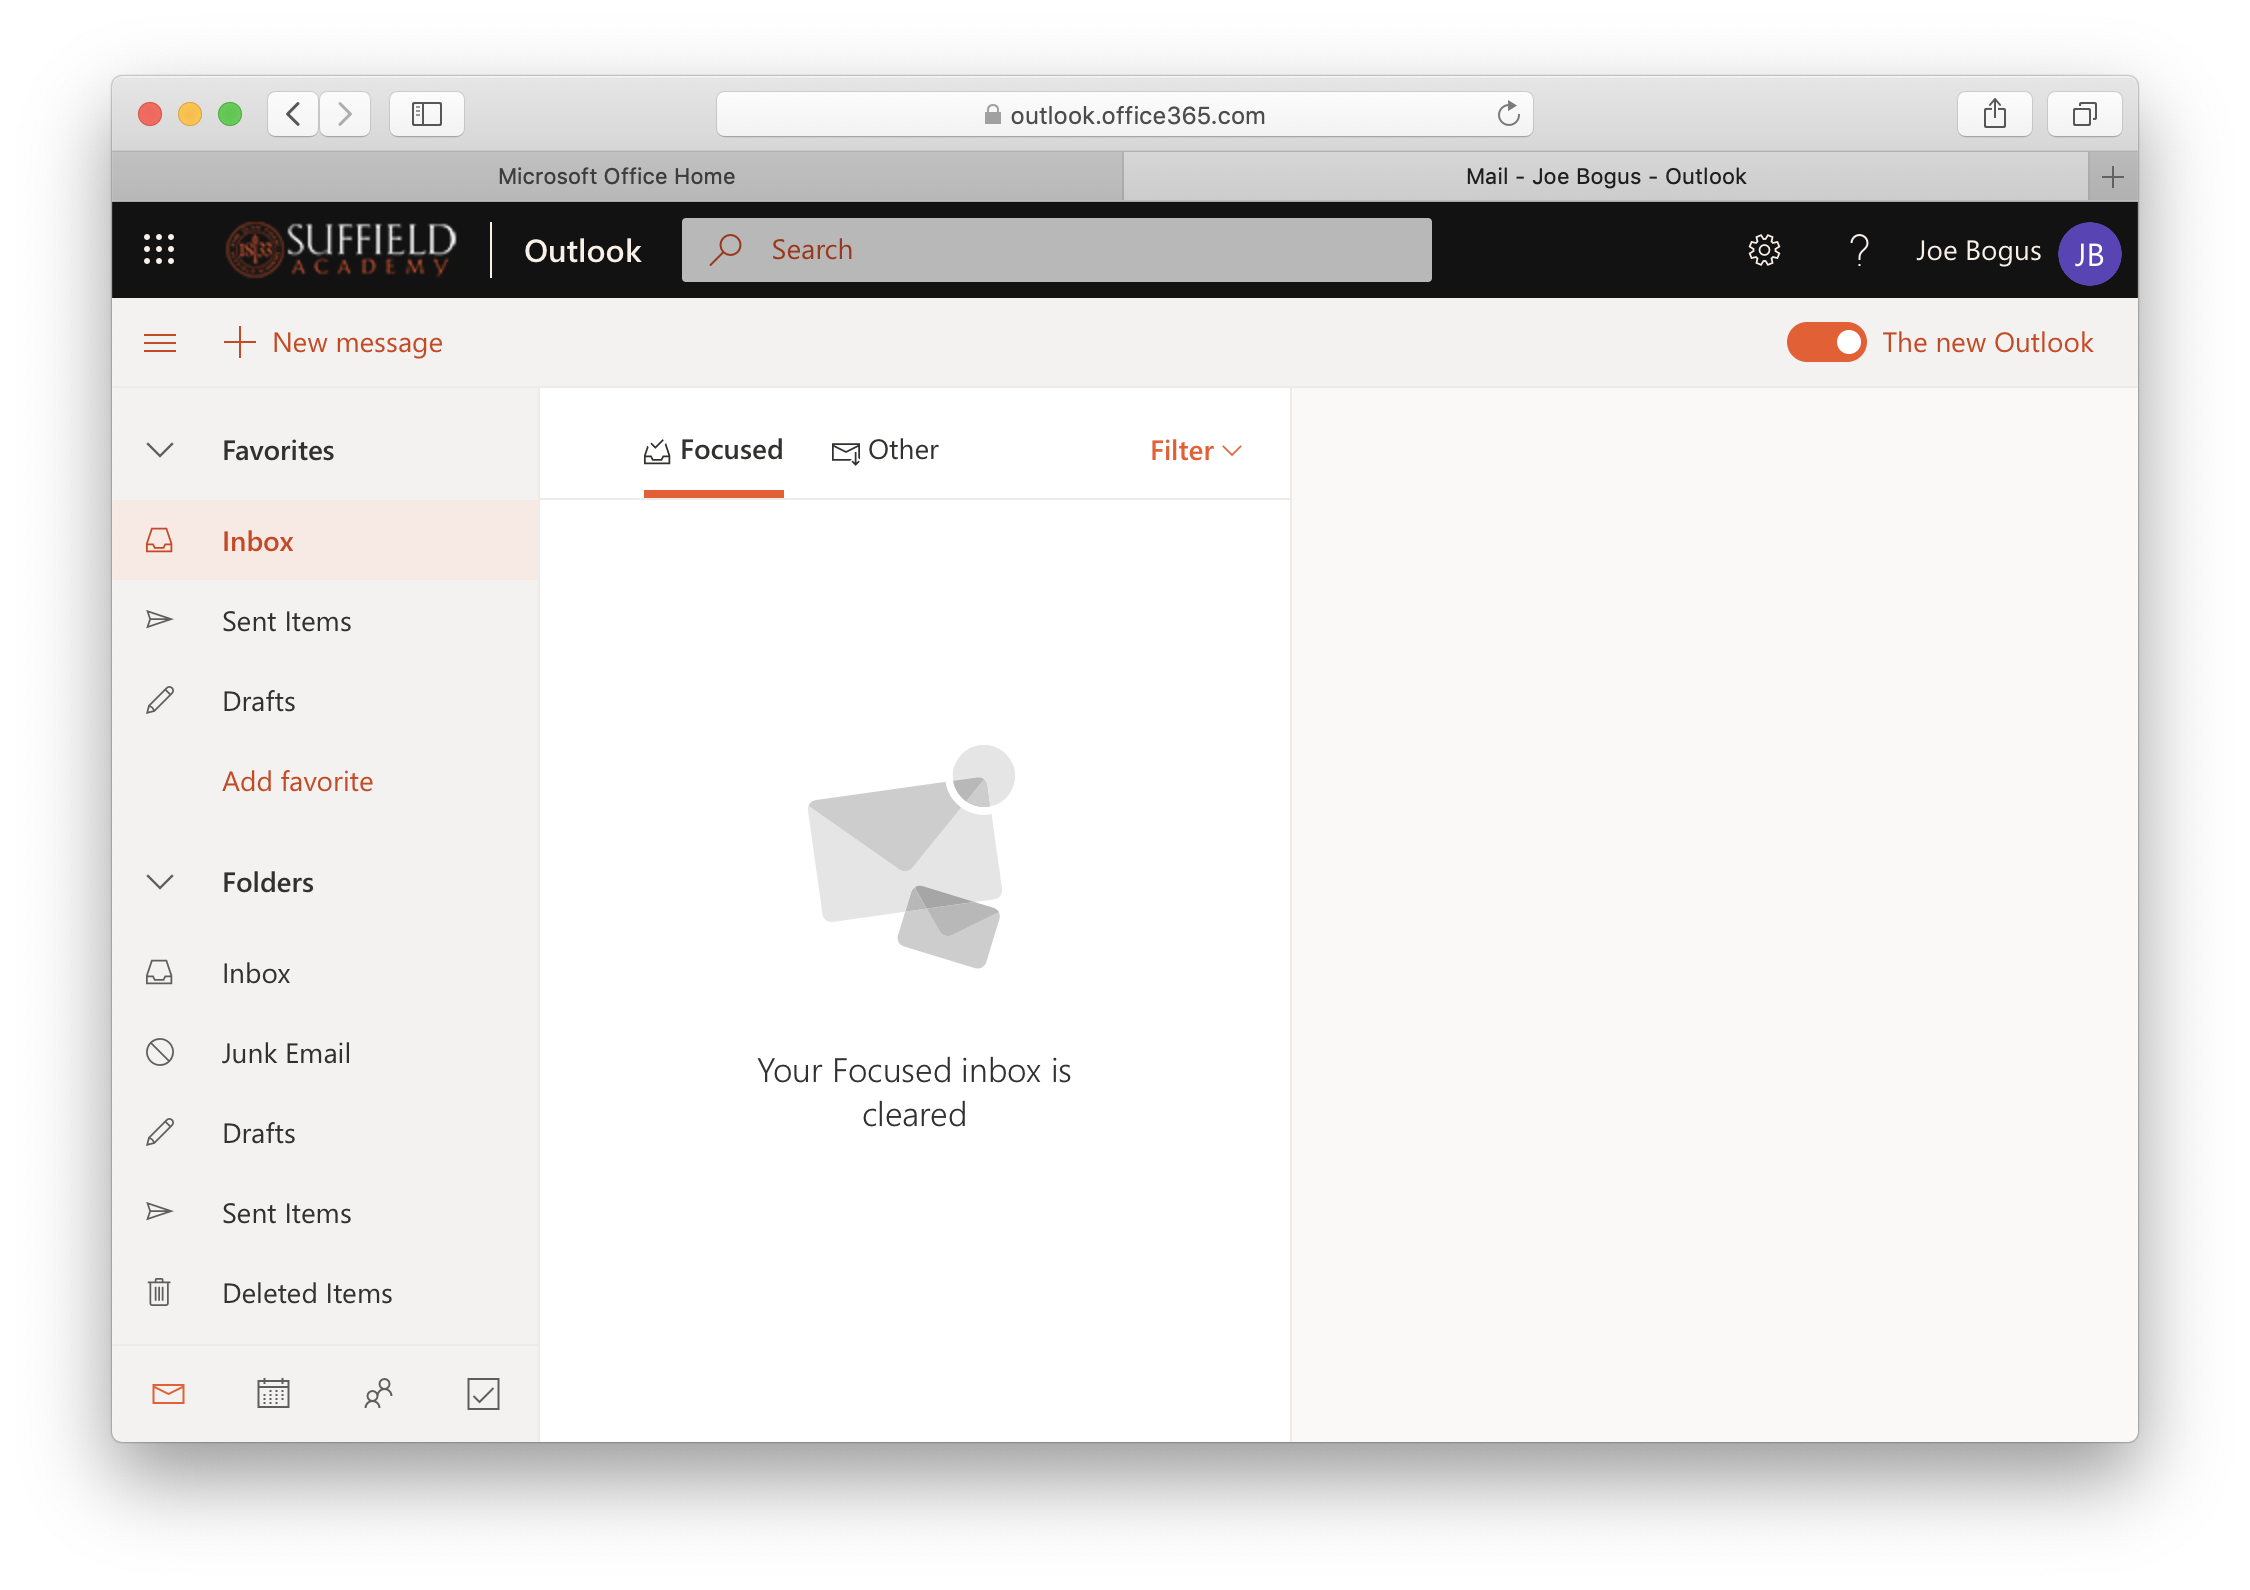
In addition to your inbox there is an important feature called Groups. Your inbox is for messages just to you, but groups are used to send messages to multiple people. Many school announcements are sent this way, so you should check your groups as well as your inbox or you might be missing important messages!
To show your groups, click the triangle icon next to the Groups item in your sidebar. A list of groups will appear, and you can click on them to read messages.
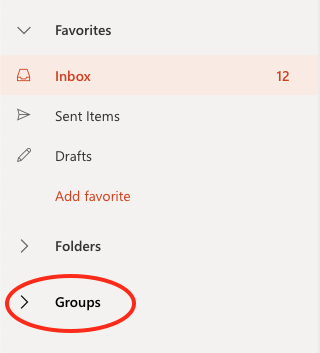
If you do a secondary click (hold the Control key and click on an Apple, or right-click on a PC) on a group name (such as All School Messages) a menu will appear. You can then choose Add to Favorites, which will cause the group name to appear at the top of your sidebar without needing to click on Groups. We recommend you do this with All School Messages and any other groups you access frequently.
Finally, you can choose Mark all as read from the same menu to "catch up" on unread messages from previous years that you don't need to review.
By default, some groups (like All-School Messages) are delivered directly to your inbox, but other groups must be checked manually. If you'd prefer to change the defaults (either to see all your messages in your inbox, or to have to click on different groups to check), you can change your preferences to do so.
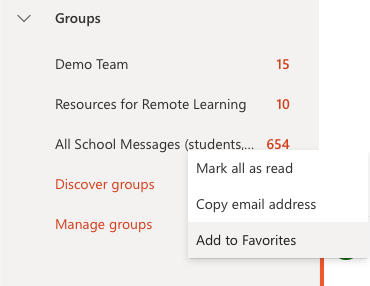
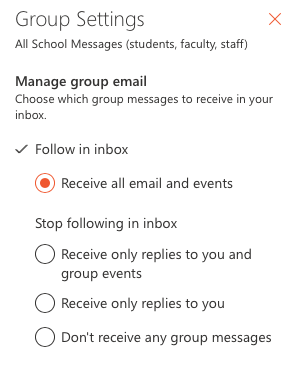
Navigate to the group you want to follow or check manually, then click on the ... icon under the group's name.
In the menu that pops up, click Settings.
On the side of your window, a Group Settings panel will appear. Click Follow in inbox to receive copies of group messages directly in your inbox, and choose one of the other options if you'd prefer to check those message manually. Note that you are responsible for checking these messages even if they are not delivered to your inbox, so choose the option that works best with your workflow.
Close the panel by clicking the X at the top of the panel to save your changes.
Forwarding Email (Optional)
If you have a separate email account that you check more frequently, you may choose to forward messages from your Suffield Academy account to your personal account.
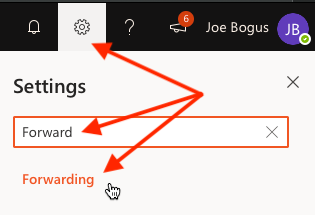
Near the top-right corner of your email window there is a Gear icon. Click this and type Forward in the search box that appears. When Forwarding appears below, click on it.
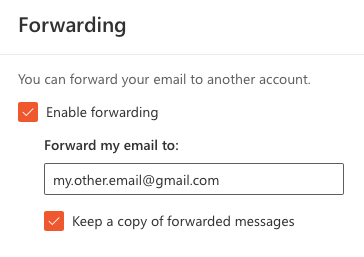
The Forwarding Settings panel will appear. Check the Enable forwarding box and enter the address you'd like to forward messages to.
We also recommend checking the Keep a copy of forwarded messages box so you always have a copy of your messages in your Suffield Academy inbox to reference.
Click the Save button at the bottom of the panel to save your changes, then click the X at the top of the panel to close it.
Wrapping Up
You are all set up with your school email! If its easier to check your email on your phone, please see our instructions for setting up Microsoft Outlook on a mobile device. The short version is simply download Microsoft Outlook from the App store on your phone, and then sign in using your email address and password.
If you have any questions, please feel free to ask a member of the Technology Department.